How to use the viewer
Step by step with screenshots. The yellow numbers on each screenshot match the points below it.
The essentials — for everyone
1Open a file
Press “Open the viewer”. You can also simply drag a file or folder into the window.
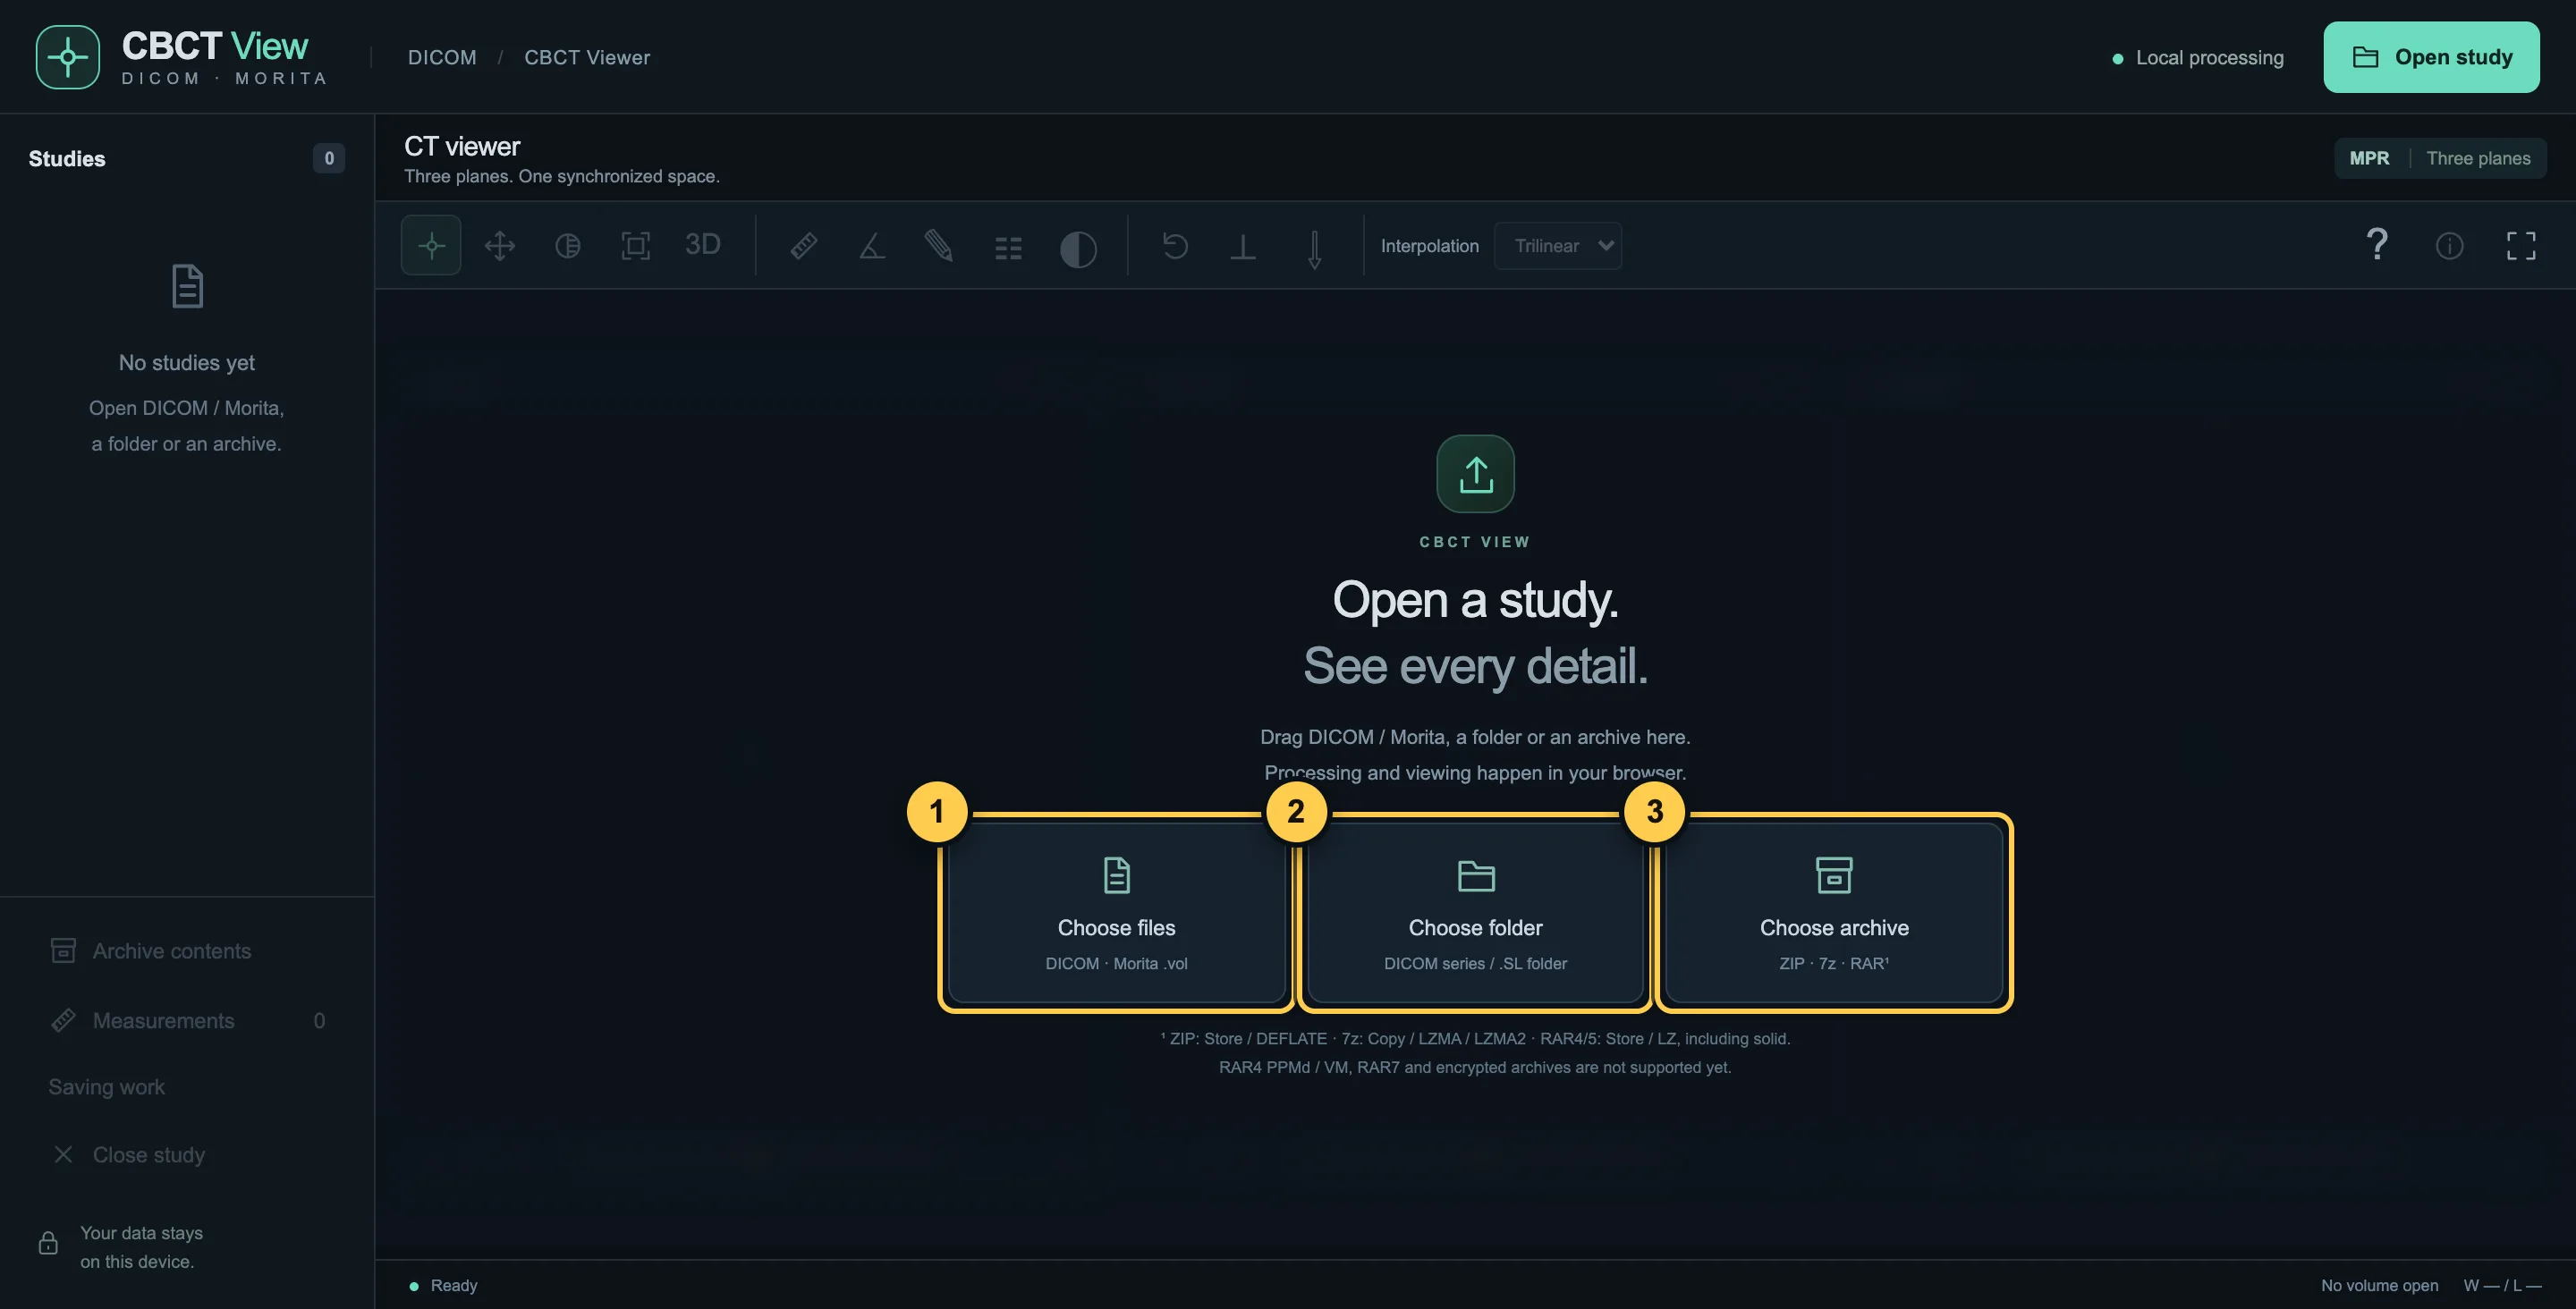
- “Choose files” — single DICOM files or the Morita file CT_0.vol.
- “Choose folder” — the whole folder from the disc you got at the clinic.
- “Choose archive” — ZIP, 7z or RAR, no need to unpack.
2Three planes
The scan is shown from three sides at once. The dashed lines show where these planes cross.
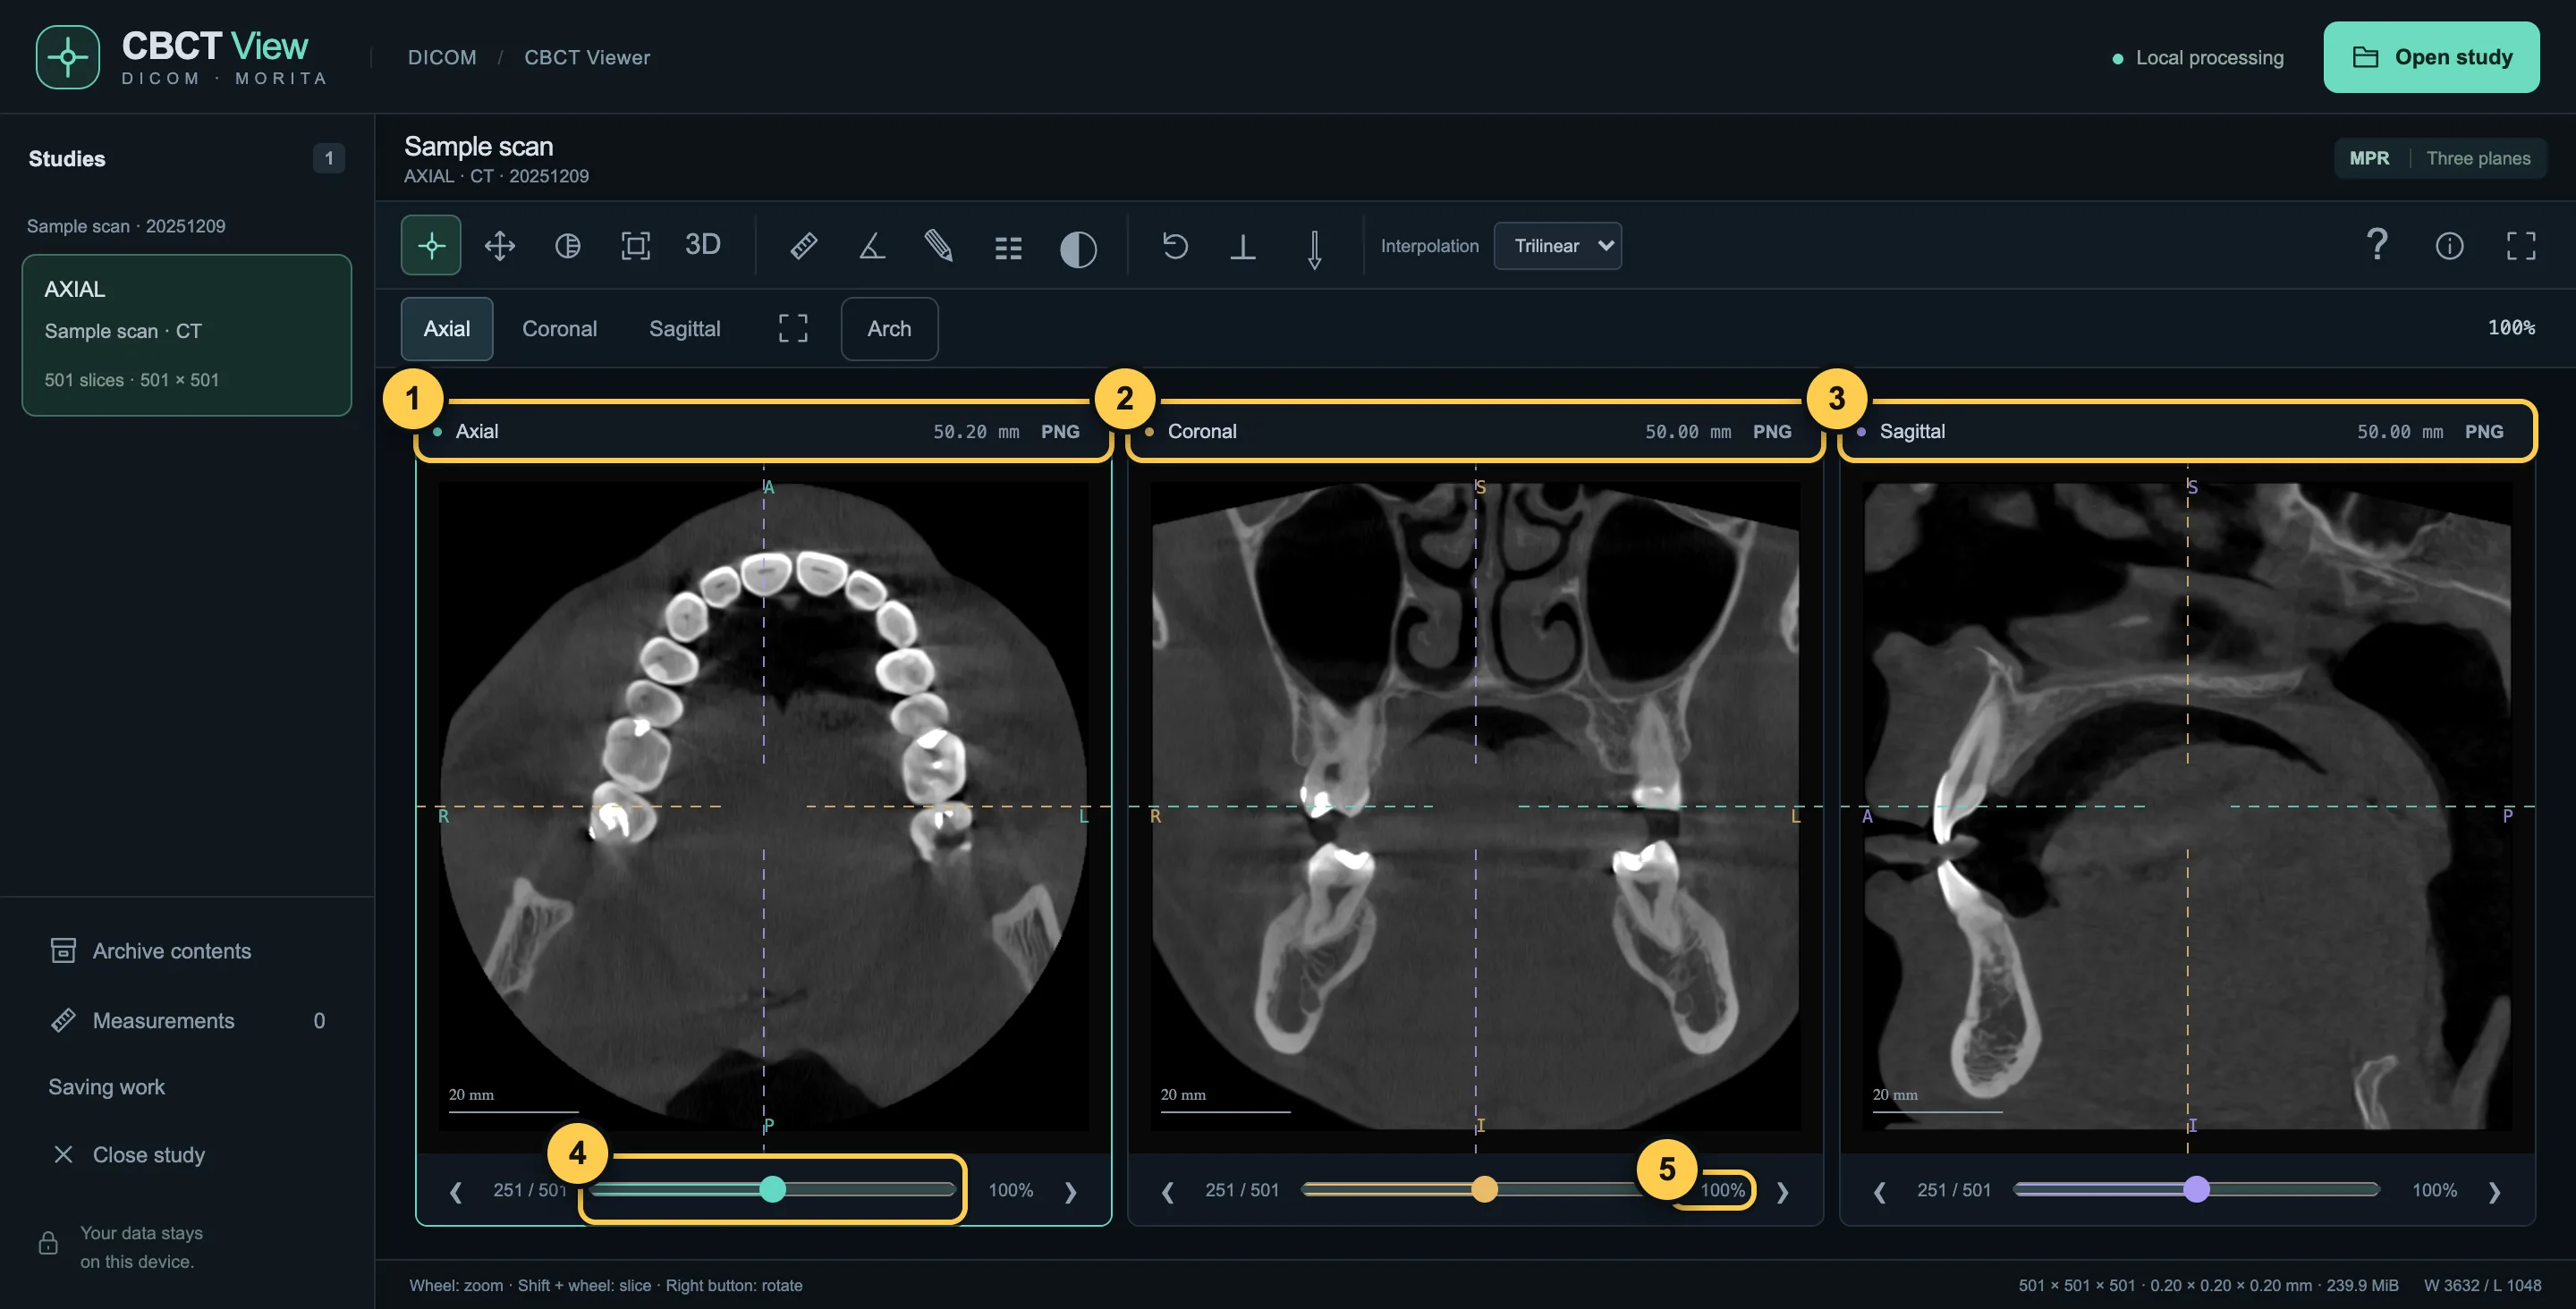
- Axial — view from above: the teeth form an arch.
- Coronal — view from the front.
- Sagittal — view from the side.
- The slider scrolls through slices. Also Shift + mouse wheel or the arrow keys.
- Zoom: mouse wheel over the image, or two fingers on a phone.
3Mark the dental arch
To get the familiar panoramic view, show the viewer where the row of teeth runs.
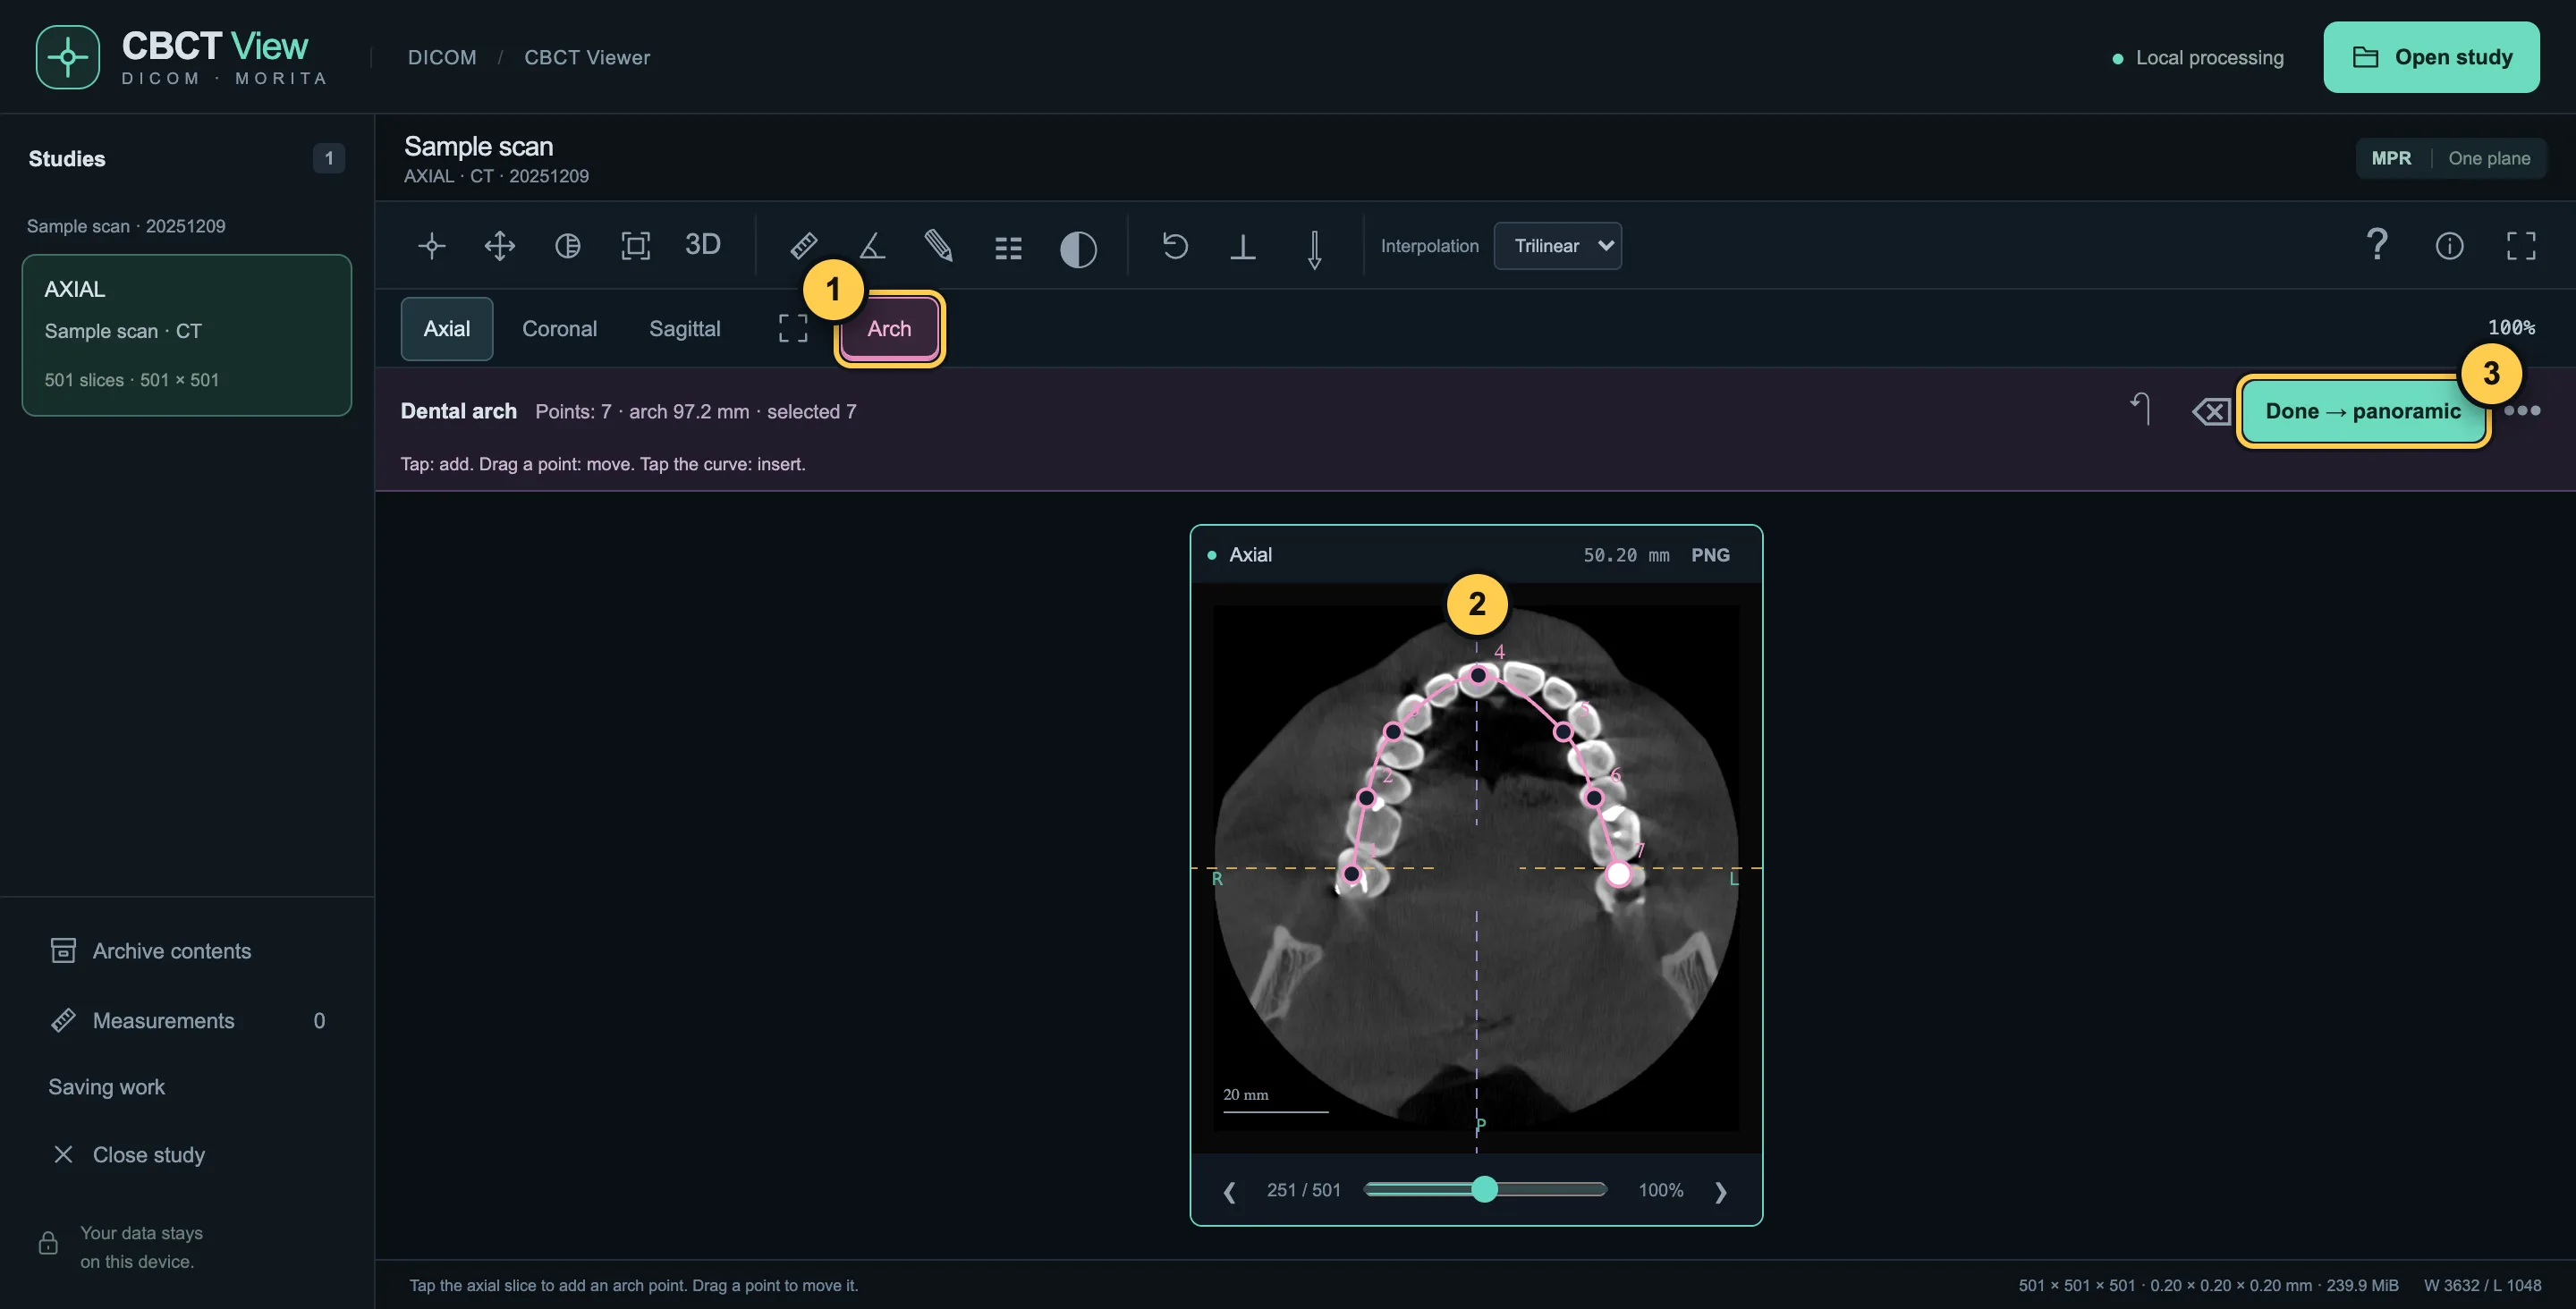
- Press “Arch”.
- Tap along the teeth from one end of the row to the other — 5–7 points are enough.
- Press “Done → panoramic”.
4Panoramic view
The row of teeth is unrolled into one image, like an ordinary panoramic X-ray.
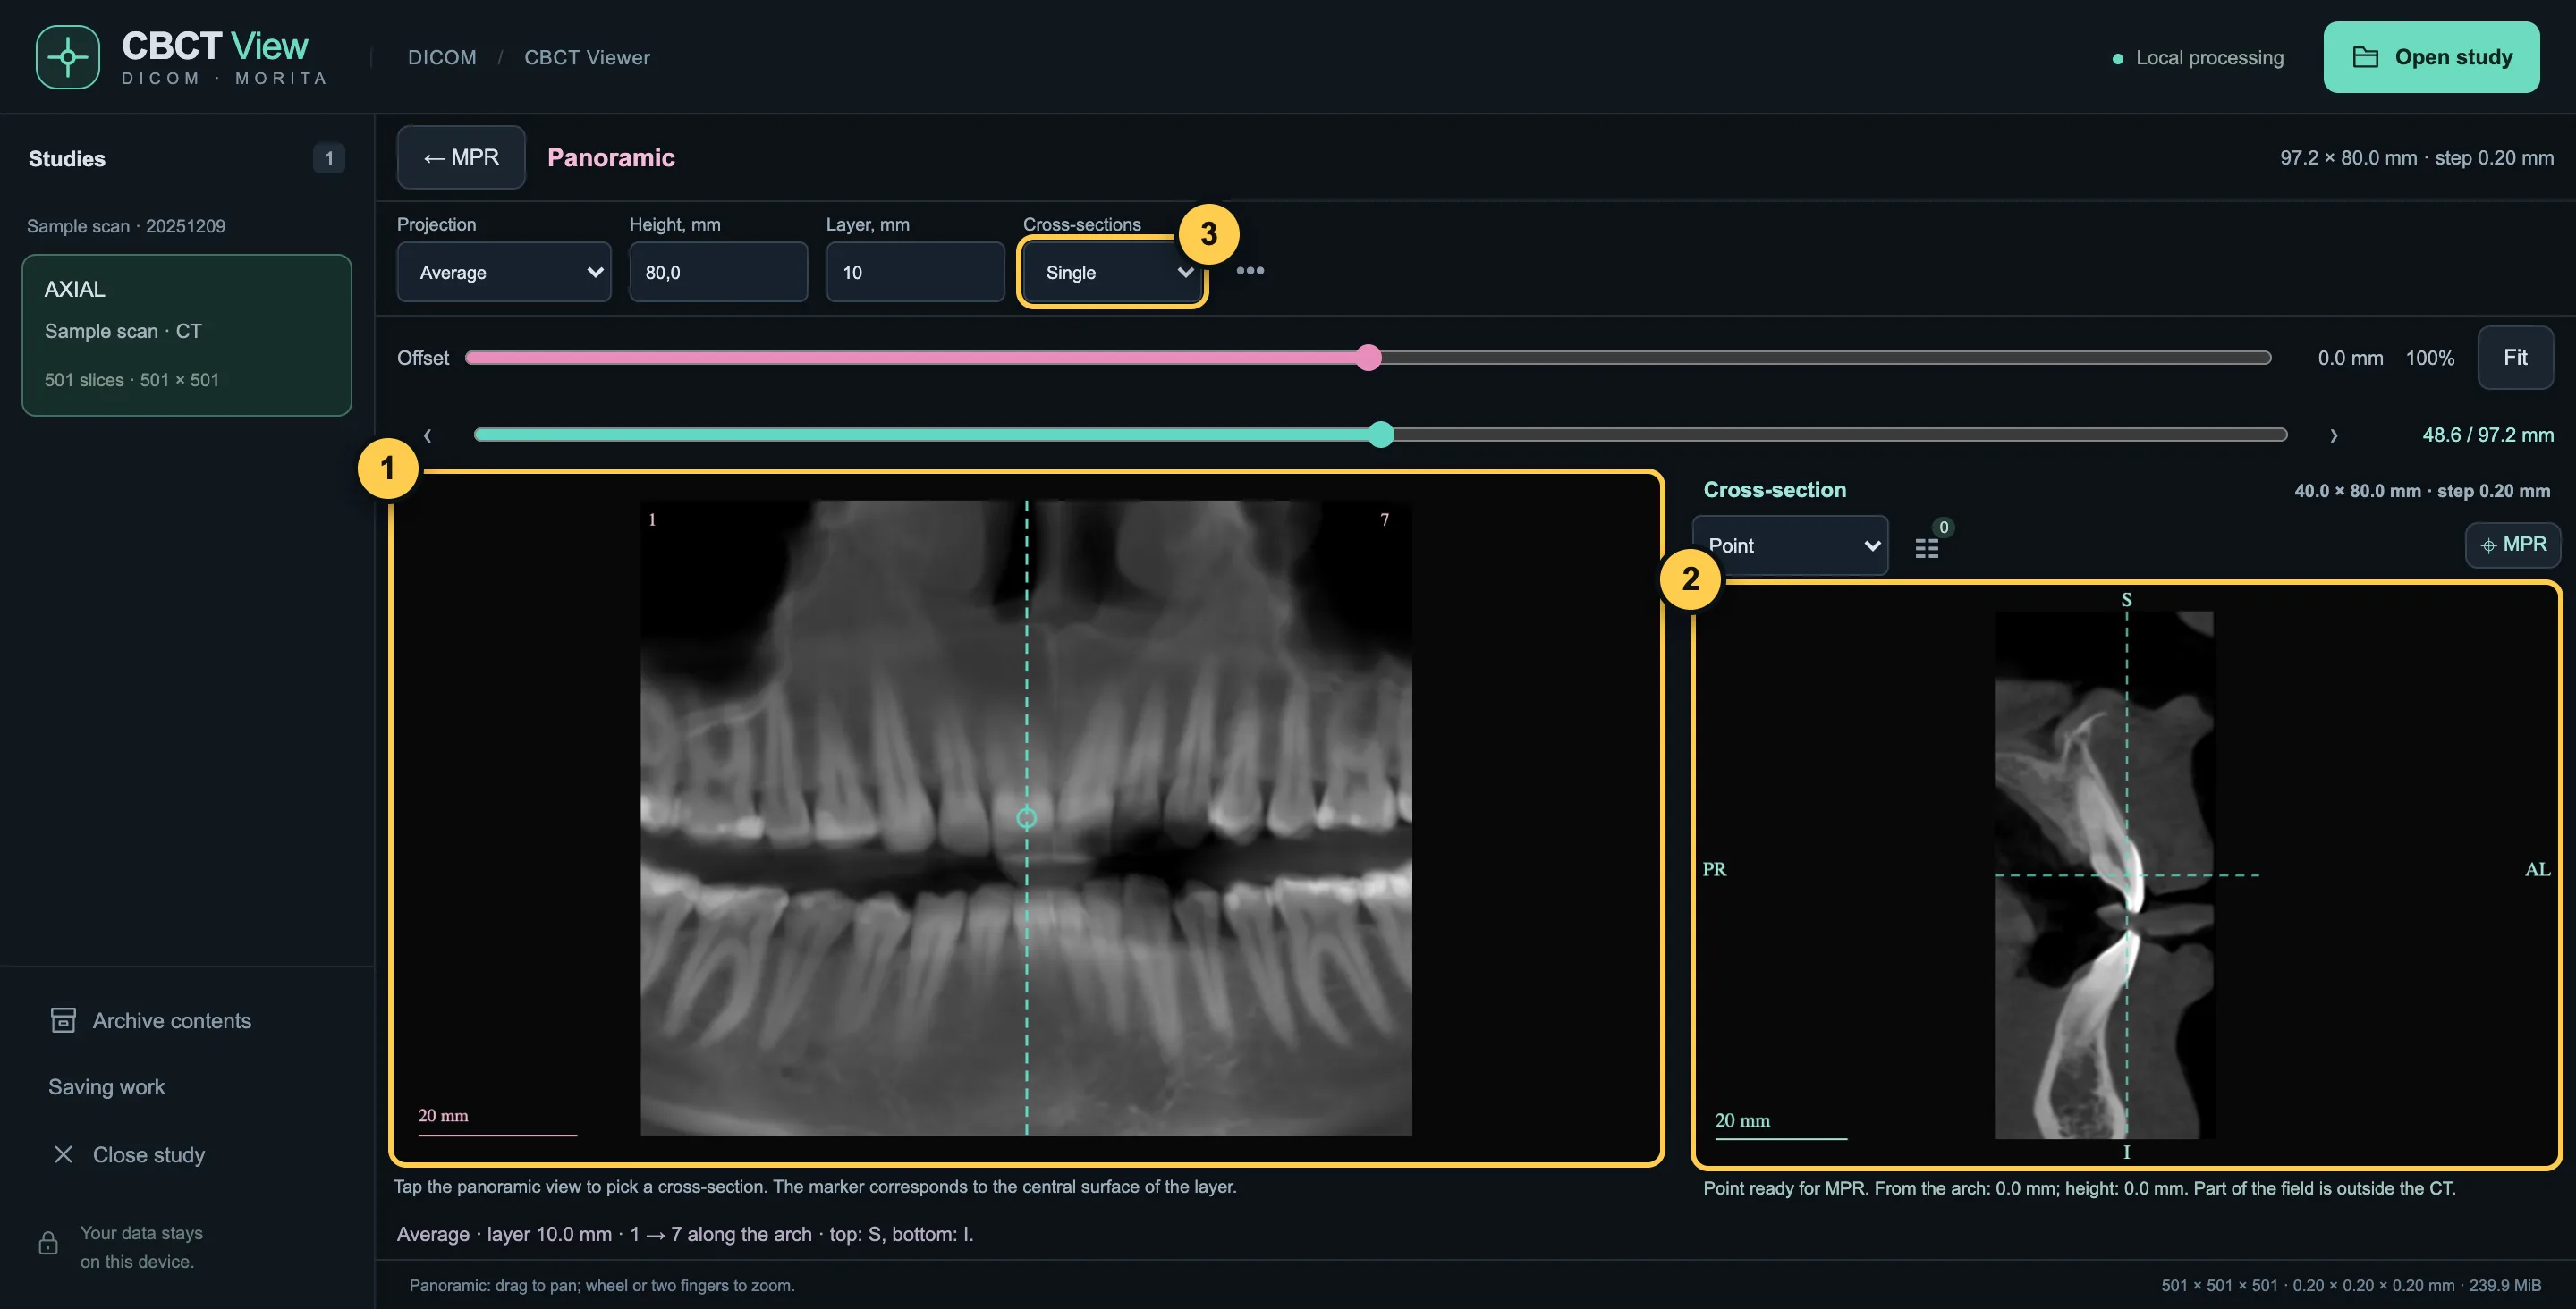
- The panoramic view. Tap it to choose a place.
- The cross-section at the chosen place.
- How many cross-sections to show side by side.
53D view
The “3D” button on the toolbar builds a 3D model.
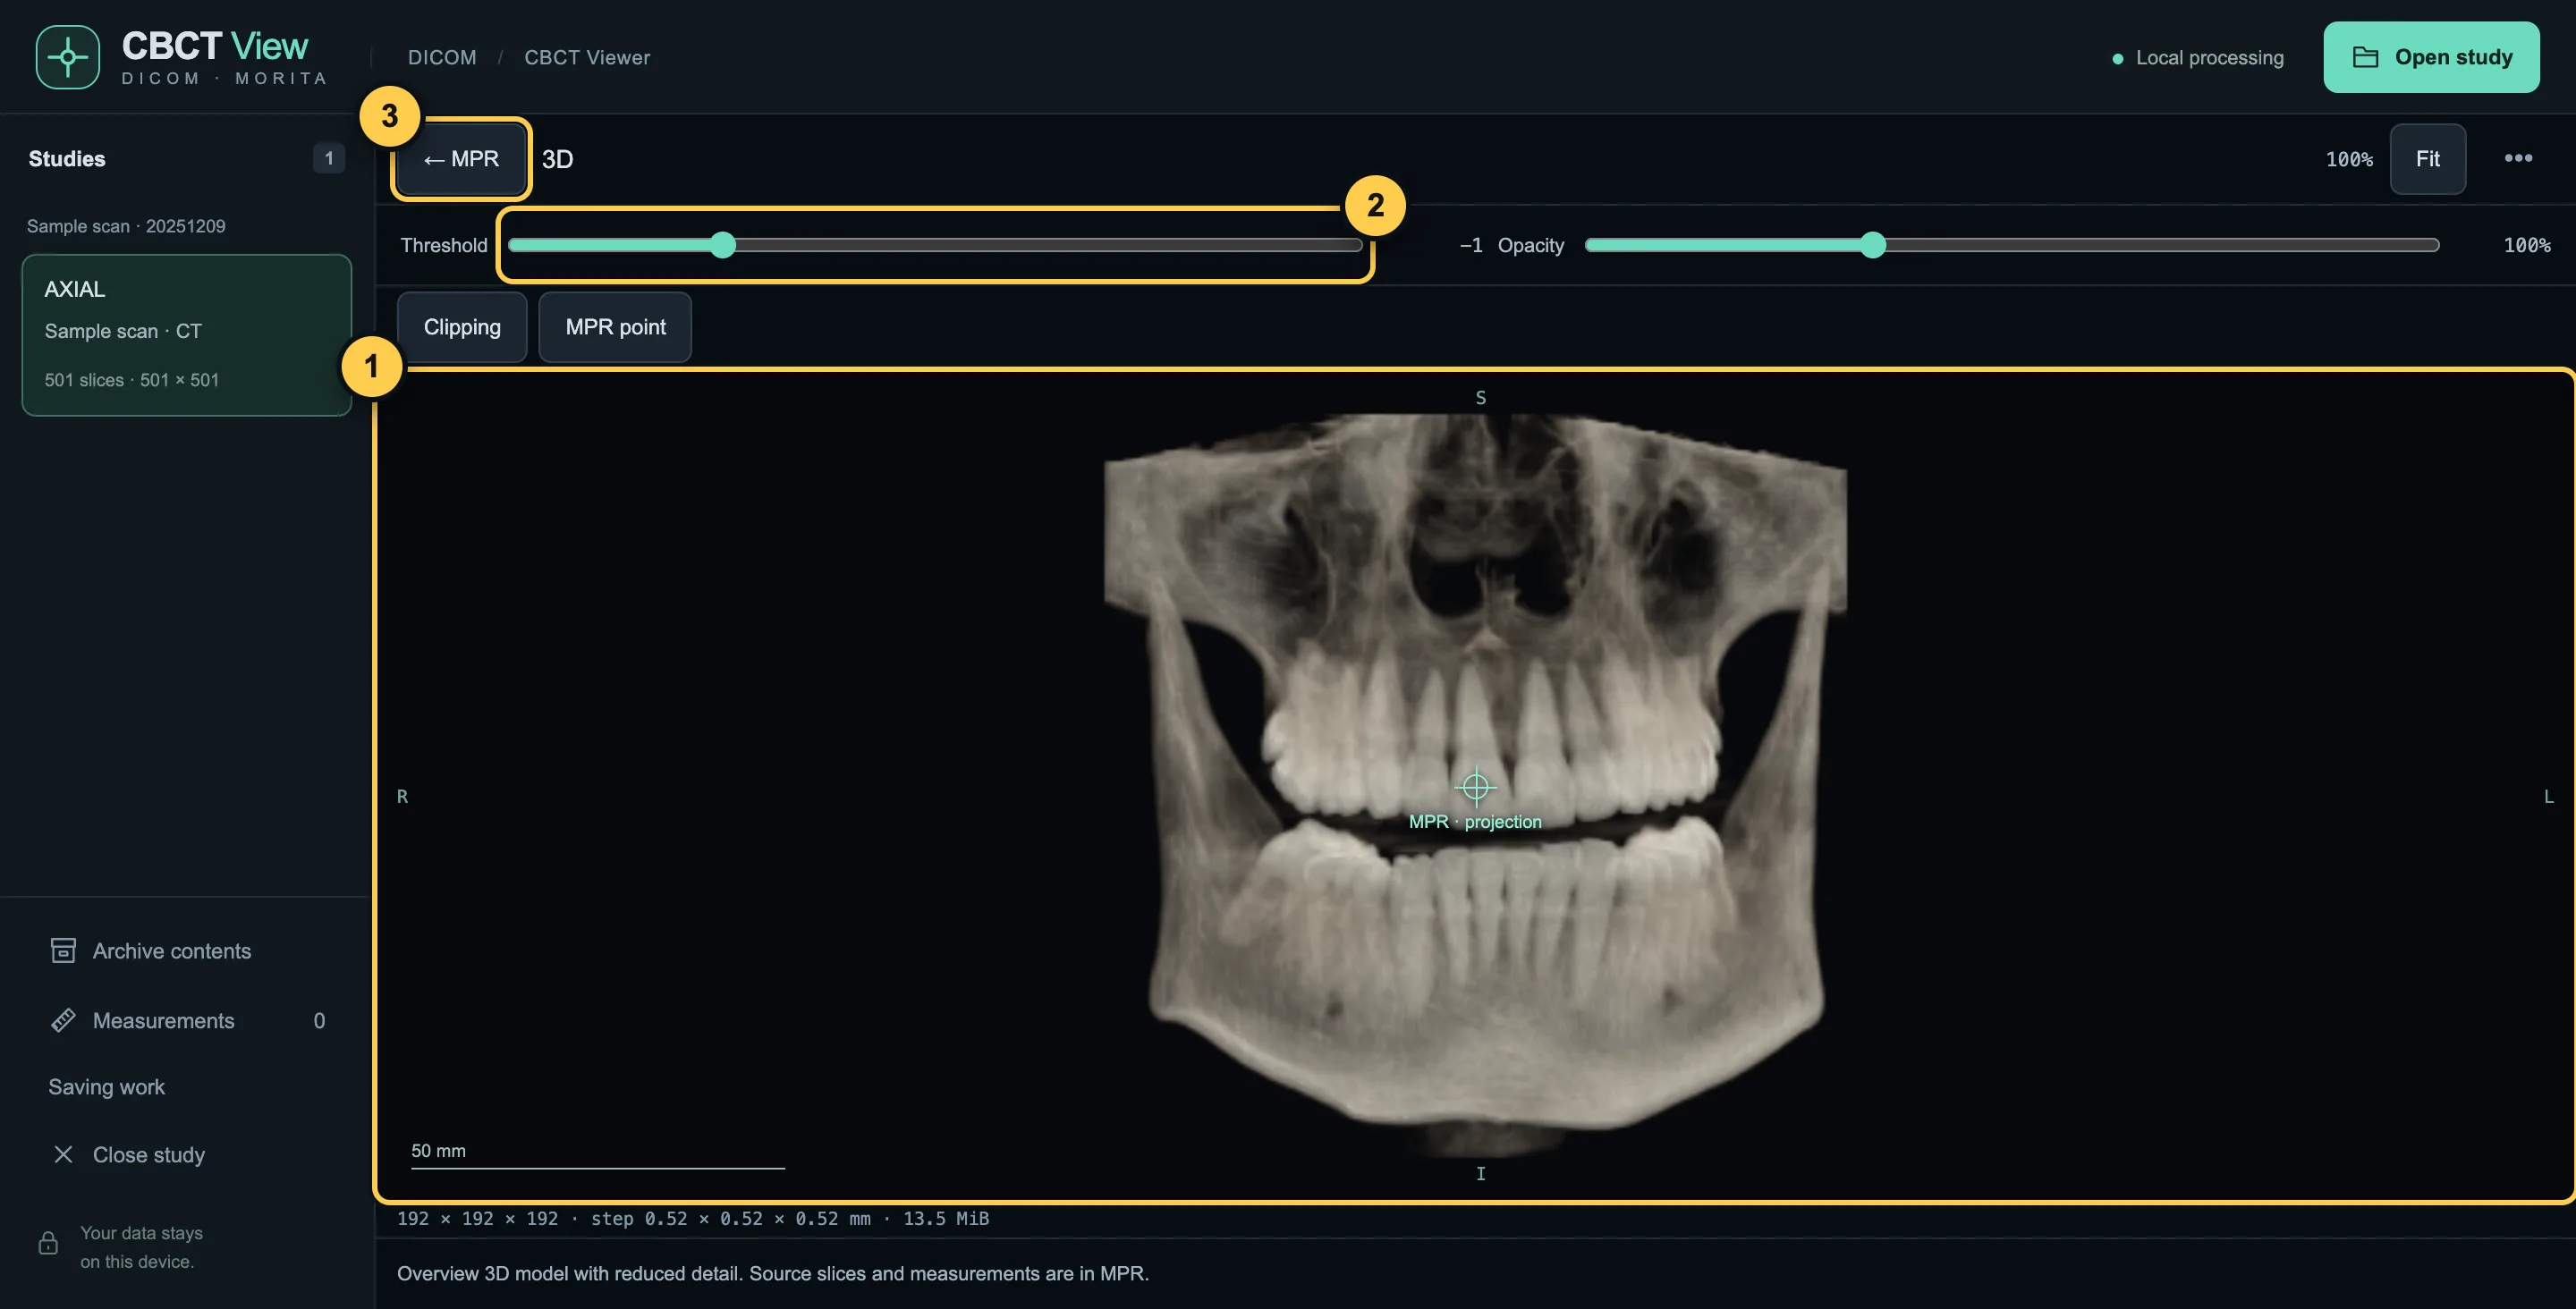
- The model. Drag to rotate; wheel or two fingers to zoom.
- Threshold: what stays visible — more or less bone and soft tissue.
- “← MPR” — back to the three planes.
6Save an image
The “PNG” button in the header of each plane saves what you see. The patient's name is not added to the image.
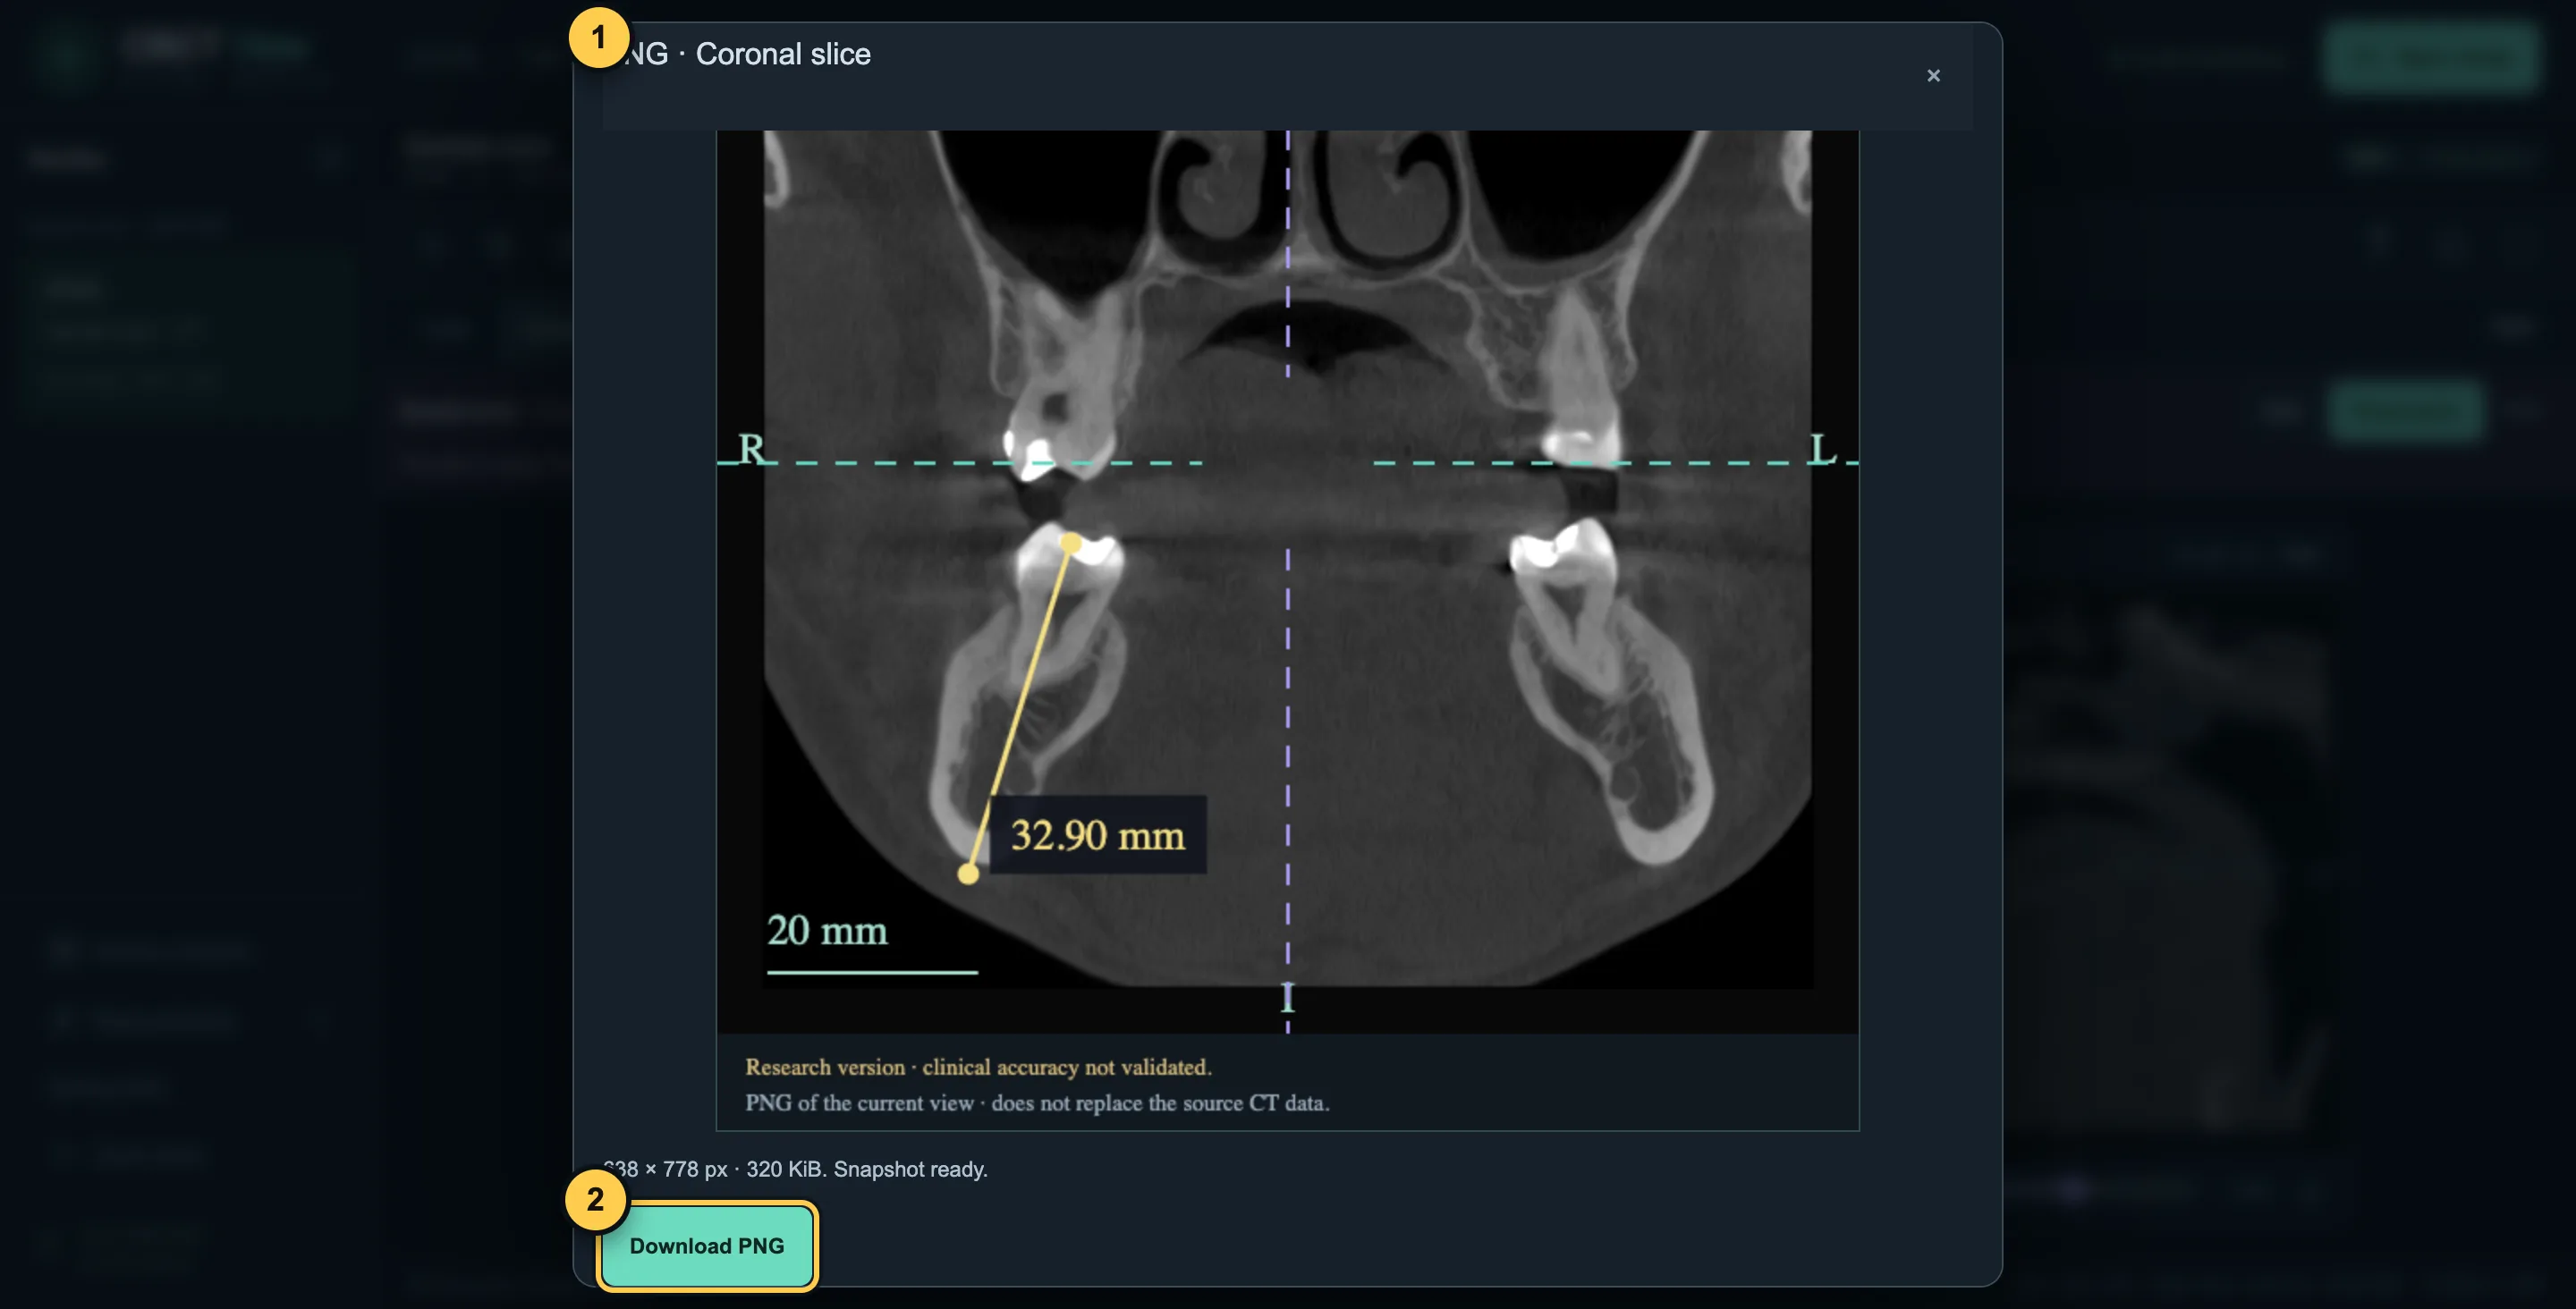
- Preview. Annotations and guides can be switched off.
- “Download PNG” — the file is saved to your device.
More features — for dentists
7Cross-sections
Several adjacent cross-sections can be shown next to the panoramic view at once.
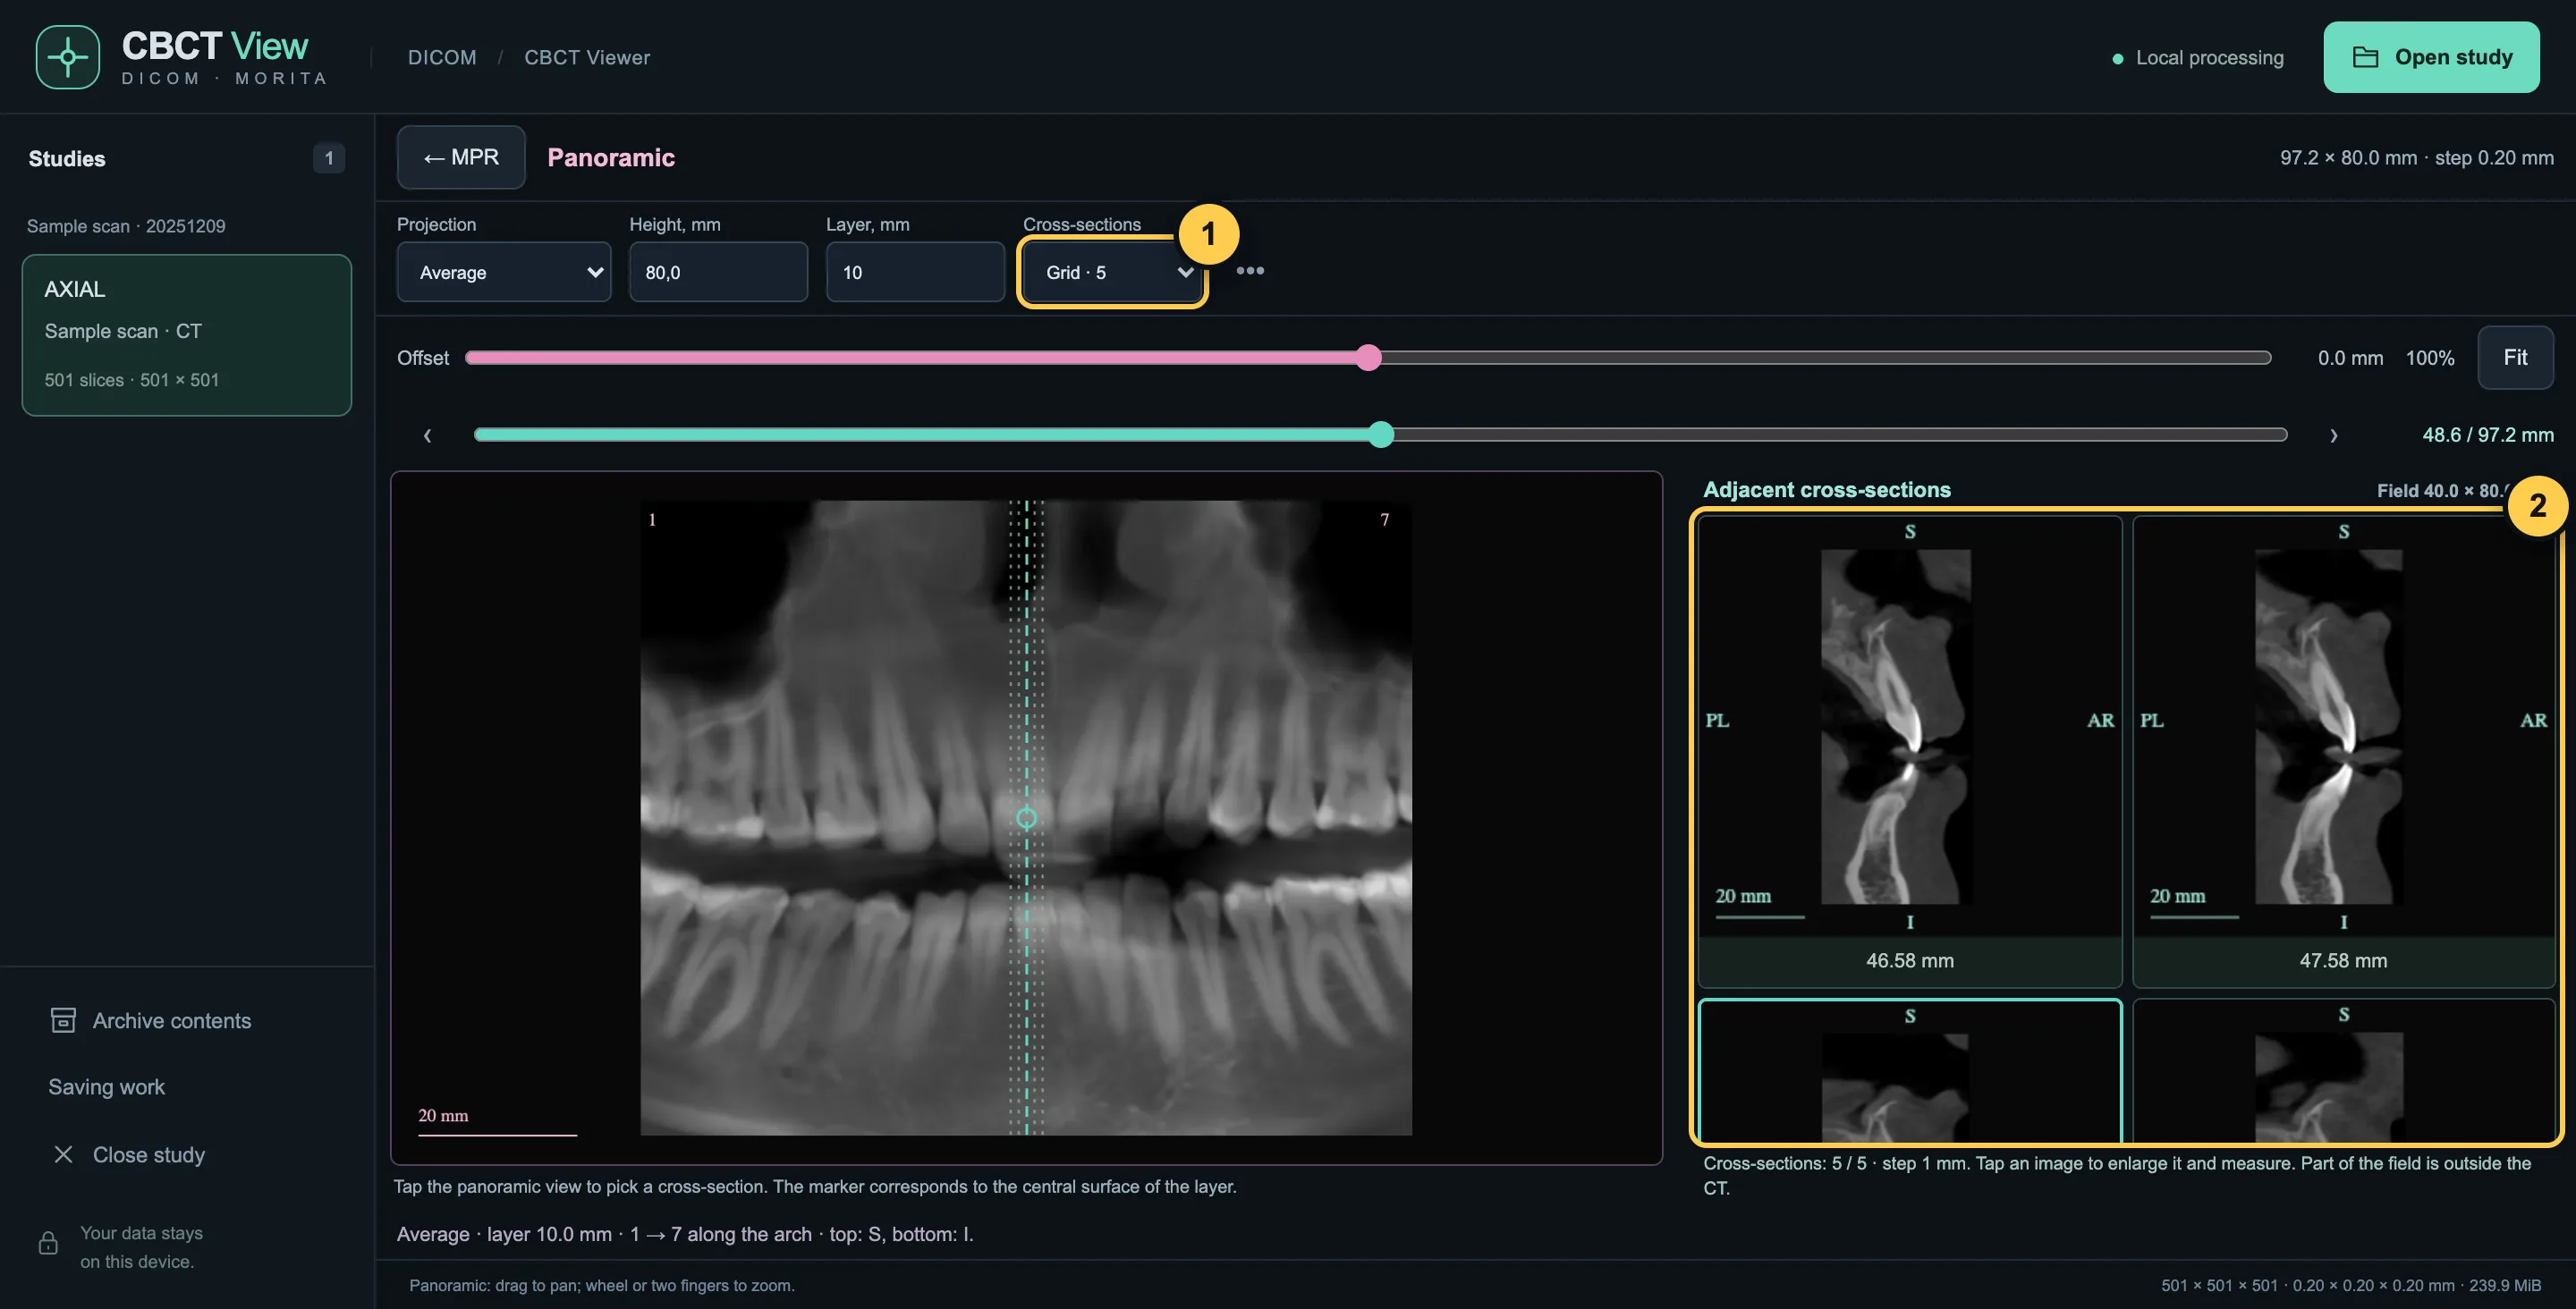
- Choose “Grid · 3”, “· 5” or “· 9”.
- Adjacent cross-sections with a step in mm. Tap one to enlarge it and measure.
8Approximate measurements
Distances and angles can be measured on any plane and on cross-sections. Measurements are approximate — not for treatment planning.
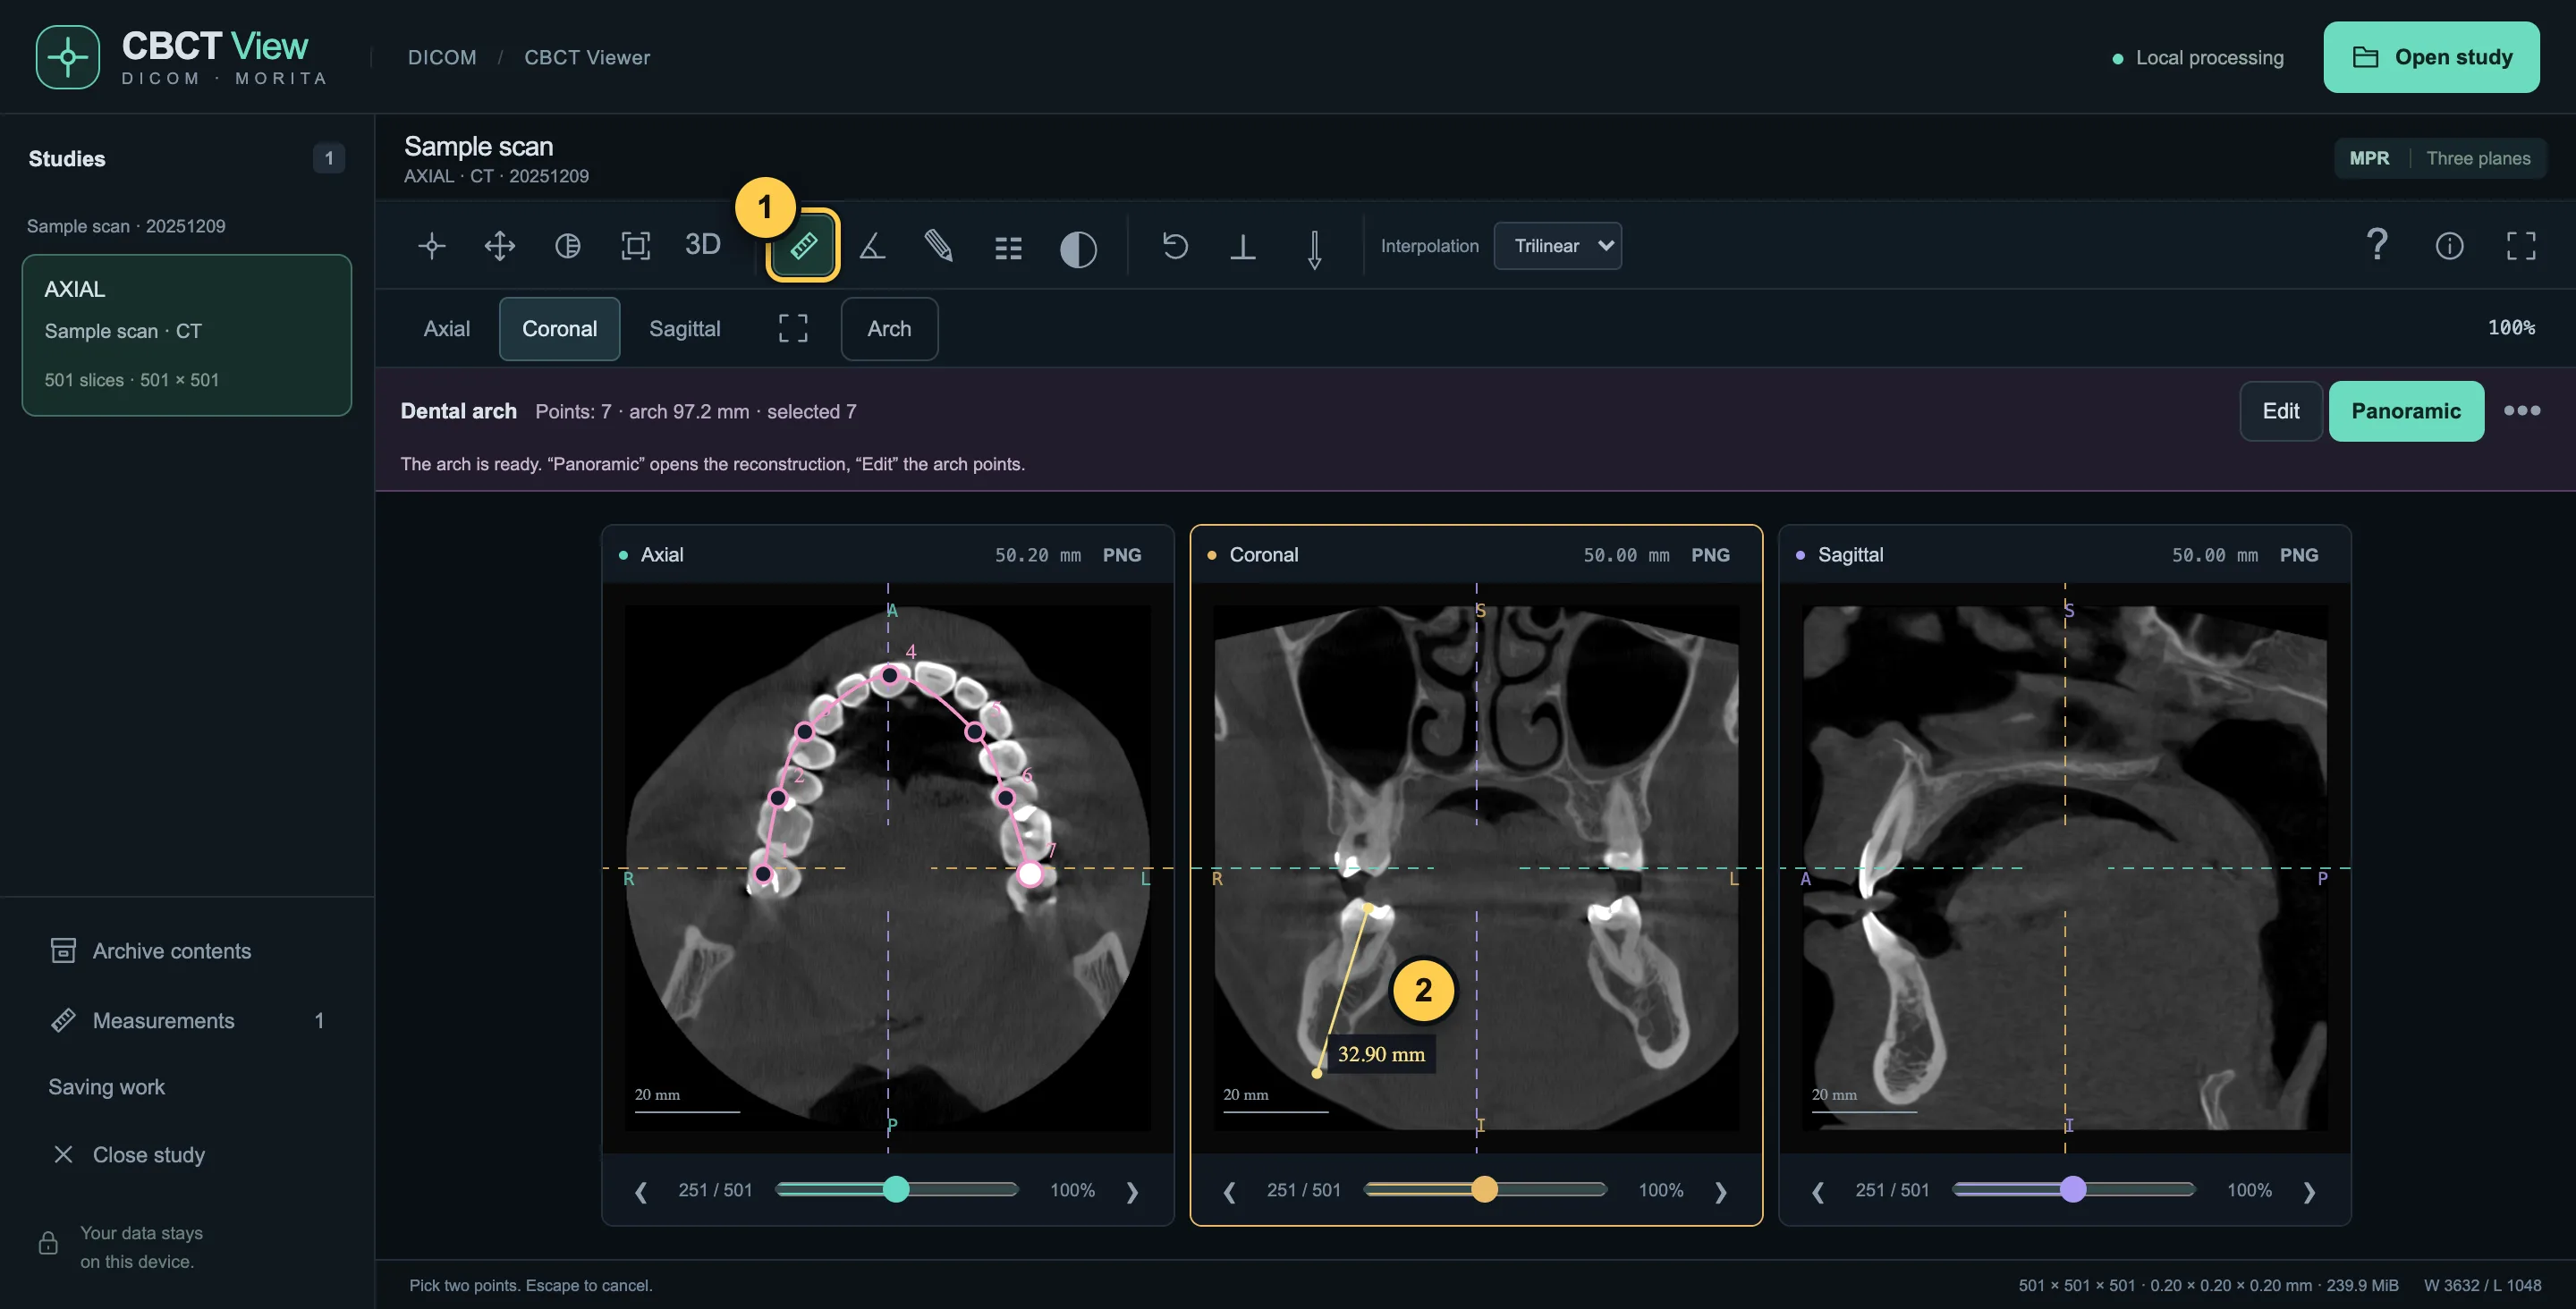
- Ruler (L key); next to it — angle (A) and editing (E).
- Two points, and the distance in mm appears on the image.
9Save your work
“Saving work” at the bottom left stores the arch, measurements and the adjusted 3D view in a small file — without the scan itself. To continue, open the same CT and that file.
10Keyboard shortcuts
- 1
- crosshair
- 2
- pan the image
- L / A
- distance / angle
- E
- edit measurements
- F
- fit to screen
- 0
- initial planes
- Enter
- one plane / three
- I
- invert
- R
- reset view
- [ / ]
- rotate the plane by 1° (with Shift — 15°)
- Shift + wheel
- scroll through slices
The viewer is for review and education, not for diagnosis. See the Disclaimer for details.